
Deploy a Shopify-Remix app to AWS Lambda using SST
How to deploy a Shopify-Remix app to AWS Lambda using SST
Getting this to work was a real struggle for me. That is partly due to my unfamiliarity with the tech stack and trying to use Lambda for the first time, but also it feels like some of these applications just do not work well together.
The piece that gave me the most trouble was Prisma. Prisma uses cjs (common js) and Remix uses esm (ecmascript module). SST also uses esm. You can use a TypeScript version of the template to start your application which allows you to set your target export to esm but, even doing that I still had issues getting Prisma to work.
I was only able to get the application to work by switching out Prisma for Kysely. Kysely is a Prisma-like library that uses esm and is more compatible with SST.
Note: You can not run this template locally because of the database. It can only run successfully in production or if you switch out the database for a local one.
Pre-requisites
Tech Stack
Step 1: Create a new app from the template
Use the Shopify CLI to create a new app using the Remix template. I'll be using npm but you can use yarn or pnpm.
npm init @shopify/app@latest -- --template https://github.com/Shopify/shopify-app-template-remix
Alternatively, you can run the shopify app creation command and choose the Remix template from the list.
npm init @shopify/app@latest
Step 2: Install SST
Install SST into your new app.
- Navigate to the root of your app
cd my-new-app
- Install SST. Follow the prompts to install SST. If prompted, choose the drop-in option.
npx create-sst@latest
- Install the dependencies.
npm install
Step 3: Configure AWS CLI
If you haven't already, configure the AWS CLI with your credentials.
aws configure
Step 4: Configure the AWS Stack
SST uses a stacks directory to define the infrastructure for your app. This is a infrastructure as code approach. I'll be using a serverless architecture with AWS Lambda and RDS.
Let's review the services that we'll be using. Lambda is a serverless compute service and RDS is a managed relational database service. I'll be using MySQL as the database engine and the serverless RDS instance type.
In order for the two services to communicate with each other and to be secure, they need to be in the same VPC. I'll also create a Security Group and add all of the services to it.
My stack definition will look something like this:
stacks/MyStack.ts
import { RemovalPolicy } from "aws-cdk-lib";
import { SecurityGroup, Vpc } from "aws-cdk-lib/aws-ec2";
import { RDS, RemixSite, StackContext } from "sst/constructs";

const ShopifyApp = (context: StackContext) => {
    const {app, stack} = context;

    /**
     * Create a VPC with a single NAT gateway
     *
     * @param {Stack} stack
     * @param {App} app
     * @returns {Vpc}
     */
    const vpc = new Vpc(stack, app.logicalPrefixedName('net'), { natGateways: 1 });

    /**
     * Create a default security group for lambda functions
     *
     * @param {Stack} stack
     * @returns {SecurityGroup}
     */
    const defaultLambdaSecurityGroup = new SecurityGroup(stack, 'DefaultLambda', {
        vpc: vpc,
        description: 'Default security group for lambda functions',
    });

    /**
     * Set the default function props
     */
    app.setDefaultFunctionProps({
        vpc: vpc,
        securityGroups: [defaultLambdaSecurityGroup],
    });

    /**
     * Create an RDS instance
     * @param {Stack} stack
     * @returns {RDS}
     */
    const rds = new RDS(stack, "db", {
        cdk: {
            cluster: {
            vpc: vpc,
            removalPolicy: RemovalPolicy.SNAPSHOT,
            securityGroups: [defaultLambdaSecurityGroup]
            },
        },
        engine: "mysql5.7",
        defaultDatabaseName: 'shopify_app_database_' + (app.stage ? app.stage.toLowerCase() : 'dev'),
        migrations: "app/db/migrations",
    });

    rds.cdk.cluster.connections.allowDefaultPortFrom(defaultLambdaSecurityGroup, 'Allow access from lambda functions');

    app.addDefaultFunctionPermissions([rds]);

    /**
     * Create a Remix site
     *
     * @param {Stack} stack
     * @returns {RemixSite}
     */
    const site = new RemixSite(stack, "site", {
    runtime: "nodejs20.x",
    cdk: {
        server: {
        vpc: vpc,
        securityGroups: [defaultLambdaSecurityGroup]
        }
    },
    bind: [rds],
    environment: {
      SHOPIFY_APP_URL: process.env.SHOPIFY_APP_URL || "",
      SHOPIFY_API_KEY: process.env.SHOPIFY_API_KEY || "",
      SHOPIFY_API_SECRET: process.env.SHOPIFY_API_SECRET || "",
      SCOPES: process.env.SCOPES || "",
      DB_HOST: process.env.DB_HOST || "",
      DB_NAME: process.env.DB_NAME || "",
      DB_USERNAME: process.env.DB_USERNAME || "",
      DB_PASSWORD: process.env.DB_PASSWORD || "",
      DB_PORT: process.env.DB_PORT || "",
      }
    });

    stack.addOutputs({
        url: site.url,
    });
};

export default ShopifyApp;
Update the SST configuration to use the stack definition.
/sst.confg.ts
import { SSTConfig } from "sst";
import ShopifyApp from "stacks/shopify.app";

export default {
  config(_input) {
    return {
      name: "my-new-app",
      region: "us-east-1",
    };
  },
  stacks(app) {
    app.stack(ShopifyApp);
    app.setDefaultRemovalPolicy("destroy");
  },
} satisfies SSTConfig;
Step 5: Replace Prisma with Kysely
Replace Prisma with Kysely. Kysely is a Prisma-like library that uses esm and is more compatible with SST.
Install Kysely.
npm install mysql2
Change the the client in db.server.ts to use Kysely.
db.server.ts
import { Kysely, MysqlDialect, sql } from "kysely";
import { createPool } from "mysql2";
import { DB } from 'app/db/types';

const dialect = new MysqlDialect({
  pool: createPool({
    database: process.env.DB_NAME,
    host: process.env.DB_HOST,
    user: process.env.DB_USERNAME,
    password: process.env.DB_PASSWORD,
    port: parseInt(process.env.DB_PORT || "3306"),
    connectionLimit: 10,
  })
});

export const kyselyClient = new Kysely<DB>({
  dialect,
});
In your IDE, the above should show an error because the DB type is not defined. In order for Kysely's type safety to work, you need to define the types for your database. You can do this by creating a types.ts file in the db directory.
Kysely provides a number of different ways to automatically generate the types. See: Generating Types.
In my case, I used the prisma-kyesly package to generate the types. You can install it with the following:
npm install --save-dev prisma-kysely
Augment prisma.schema to include the kysely property. Then run the commands to generate the types.
npx prisma generate
Uninstall Prisma from the project.
npm uninstall prisma @prisma/client
Switch out the Session Storage implementation to use MySQL.
npm uninstall @shopify/shopify-app-session-storage-prisma
npm install @shopify/shopify-app-session-storage-mysql
app/shopify.server.ts
import { MySQLSessionStorage } from '@shopify/shopify-app-session-storage-mysql';
...
  sessionStorage: MySQLSessionStorage.withCredentials(
    process.env.DB_HOST || "",
    process.env.DB_NAME || "",
    process.env.DB_USERNAME || "",
    process.env.DB_PASSWORD || "",
    {
      sessionTableName: 'session',
      connectionPoolLimit: 10
    }
  ),
...
We also need to find any other references to Prisma and replace them with Kysely.
routes/webhooks.tsx
switch (topic) {
  case "APP_UNINSTALLED":
    if (session) {
      await kyselyClient.deleteFrom('Session')
          .where('shop', '=', shop)
          .execute()
    }

    break;
  case "CUSTOMERS_DATA_REQUEST":
  case "CUSTOMERS_REDACT":
  case "SHOP_REDACT":
  default:
    throw new Response("Unhandled webhook topic", { status: 404 });
}
Run the build command and fix any errors that come up.
npm run build
For local development, the default Shopify template is setup to run the Prisma generation commands to insure that the client is up to date and the that the migrations have been run. Since we are using Kysely, we need to replace the Prisma commands with Kysely commands.
shopify.web.toml
Update [commands]
[commands]
dev = "npm exec remix vite:dev"
Finally let's convert the prisma migrations to Kysely migrations. As defined in the stack, the migrations are located in app/db/migrations.
/**
 *
 * @param {Kysely<any>} db
 * @return {Promise<void>}
 */
async function up(db) {

  await db.schema
    .createTable("session")
    .ifNotExists()
    .addColumn("id", "varchar(255)", (col) => col.primaryKey())
    .addColumn("shop", "varchar(255)", (col) => col.notNull())
    .addColumn("state", "varchar(255)", (col) => col.notNull())
    .addColumn("isOnline", "integer", (col) => col.notNull().defaultTo(0))
    .addColumn("scope", "varchar(255)")
    .addColumn("expires", "datetime")
    .addColumn("accessToken", "varchar(255)")
    .addColumn("userId", "bigint")
    .execute();
}

async function down(db) {
  await db.schema.dropTable("session").ifExists().execute();
}

module.exports = { up, down };
The above is a straight conversion from Prisma to Kysely.
Step 6: Deploy the app to Production
To deploy an app using SST, you will use the deploy command.
npx sst deploy --stage prod
This will deploy the app to AWS Lambda and create the RDS instance. You will see the URL of the site in the output. You will need that URL to configure the app in the Shopify admin.
Get the PROD RDS connection string by running the following command:
aws secretsmanager get-secret-value --region ${stack.region} --secret-id ${rds.secretArn} --query SecretString --output text
The stack.region you would have configured in sst.config.ts in my example it's us-east-1.
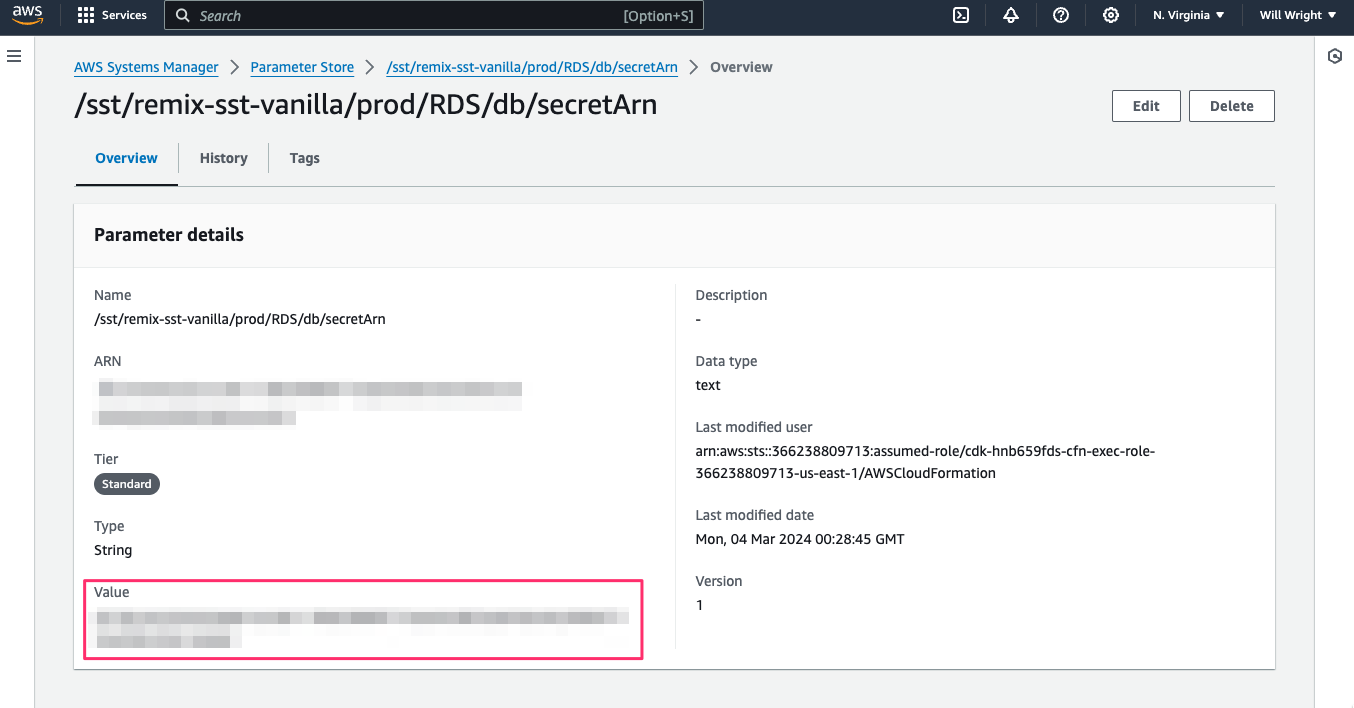
The rds.secretArn can be found by going to the AWS console, navigating to Systems Manager > Secrets Manager and finding the secret that was created for the RDS instance. Once you find the correct secret, you can copy the ARN from the secret details.
Step 7: Update the production .env file
You need to update the .env file with the RDS credentials and the site URL. SST can parse .env and various naming conventions to read different values for different stages.
Examples:
.env.{$stage}.env.{$stage}.local.env.prod.env
Check the SST documentation for more information.
I'm using prod for my production stage so my corresponding .env file is .env.prod.
.env.prod
SHOPIFY_APP_URL=https://foobaz.cloudfront.net/
SHOPIFY_API_KEY=
SHOPIFY_API_SECRET=
SCOPES=read_products,write_products

DB_HOST=RDSDB.cluster-foobar.us-east-1.rds.amazonaws.com
DB_NAME=shopify_app_database_prod
DB_PORT=3306
DB_USERNAME=admin
DB_PASSWORD=mystrongpassword
Notice the environment object in the RemixSite definition. This is how you can set environment variables in the Lambda function.
...
environment: {
  SHOPIFY_APP_URL: process.env.SHOPIFY_APP_URL || "",
  SHOPIFY_API_KEY: process.env.SHOPIFY_API_KEY || "",
  SHOPIFY_API_SECRET: process.env.SHOPIFY_API_SECRET || "",
  SCOPES: process.env.SCOPES || "",
  DB_HOST: process.env.DB_HOST || "",
  DB_NAME: process.env.DB_NAME || "",
  DB_USERNAME: process.env.DB_USERNAME || "",
  DB_PASSWORD: process.env.DB_PASSWORD || "",
  DB_PORT: process.env.DB_PORT || "",
}
...
Create a new App in Shopify and copy the API key and secret to the .env.prod file.
Step 8: Redeploy the app
After the .env file has been updated, you will need to redeploy the app.
npx sst deploy --stage prod
Once this is done, you should be able to create an App within Shopify and configure the app with the URL and the API key and secret.
Conclusion
You should now be able to install the Shopify App into a development store and see the app running in the store. One that is verified you can follow Shopify's instructions for distributing the app to the app store.